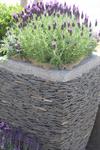
A COURSE FOR THE AMATEUR HERBALIST
- Learn to grow and use herbs at home
- If you love herbs and want to learn more under the guidance of international herb experts: study this
" I have never found the staff at any other learning institution as supportive as the staff at ACS. This gives one a lot of peace of mind and confidence to go on - at every squeak from my side, you guys have always been there, immediately to sort me out. The feedback on my lessons has always been really good and meaningful and an important source of my learning. Thanks!..." - Student with ACS
Lesson Structure
There are 6 lessons in this course:
-
Introduction to Herbs
-
herb plant identification
-
plant names
-
general characteristics of herbs
-
the history of herbs
-
herb resources (nurseries, seeds, clubs, etc).
-
Herb Gardening
-
planting
-
propagation
-
soils, plant nutrition
-
and container growing.
-
Landscaping and Companion Planting
-
introduction to companion planting
-
herb garden design.
-
Growing Herbs to Harvest
-
herb products
-
setting up a herb farm
-
making compost.
-
Herbs for Cooking
-
herb crafts
-
herb ingredients
-
cooking with herbs.
-
Herbs for fragrance, health and beauty
-
dyes
-
mordants
-
oils
-
other herb crafts.
Aims
-
Define “herb”
-
Identify herbs suitable for hanging baskets, indoor growing, and appropriate methods of propagation for at least 50 herb species
-
Define “companion planting”
-
Give examples of appropriate companion planting
-
Build an efficient compost heap
-
Identify appropriate herbs for culinary uses
-
Identify some medicinal uses for herbs
What You Will Do
-
Collect and identify 30 different herb specimens
-
Learn the basics of plant identification
-
Make contact with herb farms to ask about their operation
-
Propagate herbs by cuttings
-
Prepare a soil suitable for growing herbs
-
Design and plant a herb garden
-
Visit retailers to investigate the types of herb products available
-
Prepare food containing herbs
-
Harvest and dry a herb correctly
-
Prepare one other type of herb product
Which Herbs to Grow
We all have our favourites, but the most popular would probably be thyme, rosemary, sage, marjoram, basil, parsley, chives, mint, chervil and coriander. Some of these are annuals (die back at the end of the season), some herbaceous (die back and are dormant over winter, but re-grow each spring), and some evergreen. All will need to be managed differently although with care, they can all be grown together.
Annual herbs, such as basil and coriander, like sunny locations, fertile soil and plenty of water to keep them growing. They don’t survive winter weather in cool areas, so a basket or pot filled with basil will need to either be removed, or re-planted with something else at the end of summer.
Perennial herbs, which die back in winter but re-grow each spring, such as chives and mint, will also need winter-interest added to the pot or basket. Or an evergreen shrubby herb can be added to the mix, providing winter focus.
Evergreen herbs, such as rosemary, sage and thyme are not only useful in the kitchen all year round, but also provide winter interest. They can grow quite large and often do better in pots as they need room for their roots. But with good management, a large basket will also work for them.
Tips for success:
- Use a good quality potting mix. There are composts now especially designed for containers. These will give better results.
- Use a soil-less compost: it will be lighter
- Incorporate some water-retaining gel into the potting mix to retain moisture. Wet this before mixing into the compost, otherwise, as it expands, it will push the compost up and over the sides of the container.
- Slow-release fertiliser pellets can be mixed into the compost at the time of planting up.
- Line porous pots with a plastic liner to slow down evaporation. Remember to leave a hole at the base for drainage.
- If your basket is plastic or metal, line firstly with a decorative material, then put an inner lining of plastic to retain water. Again, leave drip holes in the base.
- Once planted up, to reduce moisture loss, cover bare compost between plants with a layer of coarse grit, or chipped bark. Use decorative pebbles for pots on the ground where weight is not an issue. Where weight is an issue, use shells; they are much lighter
- Install a drip-irrigation system if possible.
- Consider using ‘self-watering’ baskets with an in-built reservoir. These tend not to be very big.
WHO WILL BENEFIT FROM THIS COURSE?
- Herb farmers
- Herbal Product Manufacturers or suppliers
- Landscapers
- Hobby gardeners
- Horticulturists
- Herb enthusiasts
This is a great introductory level course and can be used as a starting point into learning about these wonderful plants.
