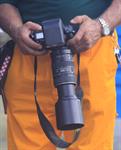
This course is longer than some; but it focuses on all of these things. We aim to not only give you the knowledge; but also position you for the best chance at developing a career.
The Diploma in Photojournalism is a broad based, practically oriented training course that will develop the essential skills required to work in this field. The student will develop a variety of written and photographic work that can be used as the basis for a professional portfolio.
Note that each module in the Qualification - Diploma In Photojournalism is a short course in its own right, and may be studied separately.

The presentation of your photographs is as important as the quality of the photos themselves. Presenting your folio to people is just like going for a job interview (it often is an actual interview), so don't pull a pile of tiny torn shots out of a shoe box, you need to look organised and dependable. First impressions count. Get a good quality case, it’s worth the outlay, then make sure the quality of your images match the quality of your case.
Constructing the Portfolio
Make sure your prints are high resolution and of the best quality possible. Whether you choose a mat or gloss finish is up to you. What is the folio for? What finish do they usually use in that industry? Your folio will change over time so be sure to factor this in when deciding what format to use.
Don't use one of those commercial photo albums with the plastic pockets and the lined information fields on the left. This is not a year 6 assignment. It's your livelihood.
You want the photos to be large enough to be impressive but not so large that you need to hire a donkey to carry them. You don't really want them any smaller than A4. A4 is big enough to have an impact but not too big to carry. A3 would be a touch more impressive.
Photos you have selected should be consistently good quality images and prints and ideally there should be something unique about them - a quality which distinguishes your work from that of other photographers.
It's also worth looking at each image and asking yourself what that image says about you as a photographer.
The very first image in your album should be one of your best shots. You want the folio to start off really strong, make an impact and carry the viewer through till the end. It's a bit like a rock concert. They start with one of their best songs in order to have an impact, and then they finish with another one of their best songs so they leave everyone on a high. This is exactly what you want to do with your folio.
Start strong, make an impact and then end on another one of your best shots. The last image in your portfolio is the last image the viewer will see and if it's really good it will stick in their heads long after the folio is closed.
Always use acid free paper and interleaves - this way they won't yellow with age. There are a number of options for different glues etc, be sure to use those specifically for photos (acid free, etc). They may be expensive but they're a lot cheaper than having to re-do your whole folio because poor quality adhesive or paper has ruined your photos. It also means that the portfolio is of archival quality - so long after you have passed away, your work will remain as a testament to your skill (or passion).
You can attach the photos using the previously mentioned photo glue, you can use photo corners, or you can use adhesive photo dots. It's up to you. If you were displaying the shots on card or foam core around a room or gallery, Velcro dots can also come in handy.
Remember you are a photographer, you are creative, make it look good and if possible match the folio style to the theme or goal. So if your entire folio consisted of shots of ice sculptures and snow then you could enhance the folio with a clear icy looking cover, if your folio consisted of nudes, you could go for a soft, suede skin-coloured cover. Alternatively, pick a style that you like such as classic black and white, 70's retro or whatever suits your images and personality, and carry that style throughout the book.
